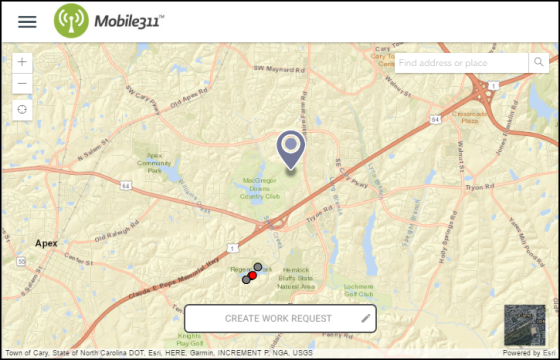
You are able to create work requests directly from the map.
Submitting a New Request
- From the map, click on the location for which you would like to submit the request. Once you have selected your location, you will see a GPS pin at that spot.
- Click Create Work Request at the bottom of the map.

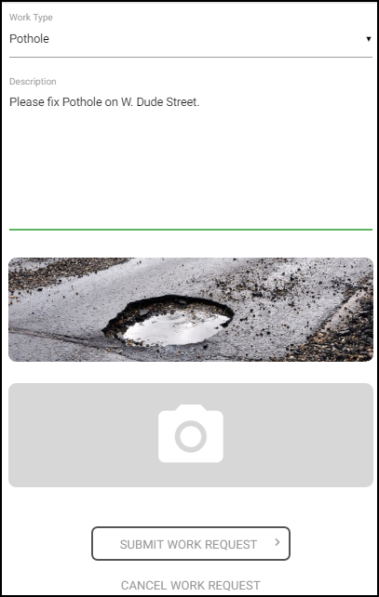
- In the side panel, select the Work Type that best describes what type of work needs to be done.
- Enter a Description with details regarding the request.
- If you have photos you would like to attach, click on the camera image. You will have the option of choosing a photo from your computer or photo gallery if you are using a mobile device. *Note: There is no limit to how many photos can be attached to the request however, the maximum file size is 10MB.
- Once all of your details have been entered, click on Submit Work Request.

Viewing Work Requests
You must have created an account to view existing work requests.
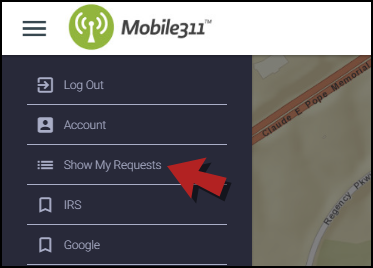
- Click the three lines in the left corner of the map to access the menu.
- Select Show My Requests from the menu.

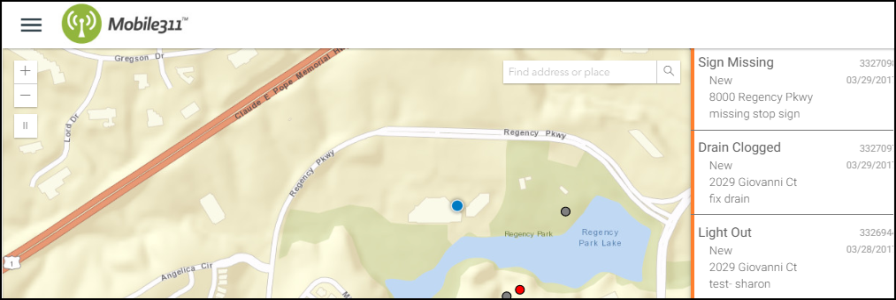
- A side panel will open displaying the requests you have submitted. Click on a request to view additional information. *Note: Once a request has been submitted, you are not able to make any changes to it. You are only allowed to add additional notes or photos.

- If you wish to hide your requests from the map, click on the three lines again and select Hide My Requests.
Once a request has been created, you have the ability to add Notes to it. Notes allow you to leave comments on a work request for other users to see. This is a great way to communicate back and forth about the request. Click on the Notes image to add your note. Once you have added your Note, click Save Note. Now, when you access this work request, you will see any notes that have been entered. *Note: If a user replies to your note, you will need to access the work request to view it; the system does not send an email notification.
